
Monday, 7 May 2012
Client Brief Rigging
Ultimately I'd like to one day be a rigger, so I put myself forward to be the one who would rig and animate our object, the rig is very simple, other than the landing gear where there's a piston rig, it's just basic linking. I used spines as control objects to make the scene look a bit more clean and easier to animate.

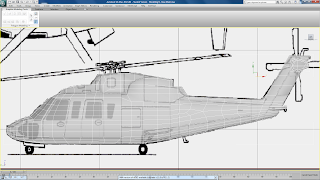
Cleint Brief Fully Assembled
It was finally time to put all the pieces of the helicopter together and I was pretty nervous, only being in college for one full day and two half days means that you don't get a lot of time to sit with your team members and make sure that everything is to the same standard (I mean that in terms of size), so it came as no surprise when the main rotor blade was about 100 times larger than the main body. There were further problems to compound the issue; we needed to import our objects into Nick's scene becuase he'd already set up a rig for the landing gear and scaling bones with links and constraints is not advisable, but the rear landing gear was out of proportion with the front and when positioned correctly would touch the ground from in the helicopter. So I deleted the rig, scaled the objects and put in another rig which solved the problem. There is an issue of the landing gear properly fitting inside the helicopter when the side and front flaps are closed, but we'll just have to use clever camera trickery to solve that...
(The main rotor was modeled by Aaron, the landing gear was modeled by Nick and the rear rotor was modeled by Scott)


(The main rotor was modeled by Aaron, the landing gear was modeled by Nick and the rear rotor was modeled by Scott)


Client Brief Texturing
My plan from the start was to create the helicopter body with nice relaxed UVs and a clone with Planar mapping. The reason for this was so that I could use Mudbox to paint on the second object and then use Mudbox's 'Transfer Paint Layer' to the first object. I briefly mentioned this a few weeks ago to the client, CGFX, during our pitch in college and at the time one of the representatives, Graeme Palmer, suggested that I should use Max's 'Render To Texture' feature to transfer a diffuse map from an object with Planar mapping to one with nicer UVs as that was what they used in their work, I tried both methods and the one that Graeme Palmer suggested work best.


Client Brief UVing
It's been a few days since I've updated my blog, UVing wasn't hard, it just took aaaages - in the end I had 179 UV shells all of which had to have map seams manually selected, and then positioning the islands so that they fitted inside the 0-1 square was a bit tricky. The reason I wanted to make the most of the texture space was because I'm expecting to render out some close up shots and so I'd like the texture to hold up at close range.


Thursday, 3 May 2012
Client Brief Update
Finished adding the supporting edges for my helicopter and took some screen shots of my scene using a Skylight for lighting with the Viewport rendering mode set to Realistic with Shadows and Ambient Occlusion turned on. I'm fairly happy with how it turned out, it gets a bit ugly when you look underneath, I had to create cavities in the helicopter body for the landing gear and adding the extra edges around those areas is what gave me few lumps and bumps. Anyway, it coming along quite nicely and the next stage is UVing, I'm going to use TexTools for the first time to help, mainly to keep the texel density consistent across the UV shells, I'll use Pelt mapping to create non-distorted UVs.


Wednesday, 25 April 2012
Client Brief - CGFX Aberdeen
It's the last brief of the 3D animation college course and it involves an outside coming in and delivering a brief base on what required in the industry. Given that CGFX is predominantly and oil and gas visualisation company, it was no surprise that when we were given the options of modeling and (realistically) rendering either a helicopter, an ROV or a vessel. We were put into teams of four and so we all came to the collective decision to model the helicopter because we thought it would be easiest to split the modelling job four ways; I was in chrage of doing the helicopter body which I think is coming along quite nicely. There are lots of small details which would be impractical to model or even place on top of the surface as seperate objects, so I think I'm going to experiment with Mudbox a little and use a comination of its curve objects and its ability to paint bump maps in 3D and see what I get.


Playing With Normal Maps
It's been a while since I've posted anything, but I've been quite busy recently getting application forms filled in and sent of with regards to the Master's course I'll be doing after Summer. But anyway, before Easter I saw that a few of my class mates were creating some pretty cool looking rifles for computer games in Max and so, inspired by this, I thought I'd give it a go myself and hopefully improve my understanding of baking out normal maps in Max. I found some really nice AK-47 image planes at http://the-blueprints.com/ and while modelling an AK-47 is certainly nothing new, I've always quite like the look of them since using them in Counter-Strike 1.6 (that's right! No Source for me!). So I started by modelling the high poly object before doing a little normal test render on the magazine clip and, considering this was my first attempt and I wasn't following a tutorial series or anything, I was pretty happy with what I ended up with.


Subscribe to:
Posts (Atom)